Friday, September 28, 2012

New Printing Area

Ok, now I'm finished!  I came upon some good sized crates that I used to move and reorganized my printing area and store quite a bit of stuff in 8 new cubbies!
It's nice and high so I can easily use a baren to transfer my inked plate onto paper or my little "Big Shot" that you see all the way to the right with pretty pink handles.  This is a recent addition to my tool chest and have been experimenting quite a bit with...more to come about that in an upcoming post.  Or I can use my very old Speedball Press, all the way to the left, that I hope to replace with a newer version sometime soon.

And this is behind me in the same little area where I now have a nice clean spot to store flat (just under the table) and cut paper!  I was really surprised at how much paper I actually have on hand - I just had it in so many different places that I forgot I had some of it!
It won't make it in any of Interweave's Studio magazines but it works for me!

Tuesday, September 25, 2012

It's Heaven To Me!

Been cleaning again...it never ends, does it?  But this time I've really done it!  I cannot tell you how happy this makes me!  And no, I'm not really quite finished, BUT...I unearthed some supplies that have been missing for a couple of years now and have been searching for because I need them about now. I knew I had a bunch of dye and discharge paste and GAC somewhere but I was beginning to believe I had lost a box in the move here, so I'm thrilled to find them before I broke down and bought them again! So, I thought I'd share!

Starting with the art studio which is located above a 2 car garage in an unfinished space, perhaps a bit "inelegant," but it serves it's purpose quite well! As you can see, there is now a place for everything and it's heaven to me!

This table is so old I bought it when I still lived in SF at Flax when I was a University of Berkeley student in the Interior Design/Interior Architecture Program in SF.  Although I don't use it for a drafting table anymore, I still love it and it's the most used table in the room:
Same area from the side showing the great light (a precious commodity up here) that pores in from beside my drawing table:
Scooting over now to the left is my laptop, my coil binder, my Dremel drill in a drill press I rigged up years ago when I was routinely drilling holes in polymer clay beads and I now use for many tasks:
And walking back again to this area, on the left is storage for all of my carvings which I keep organized in boxes, mostly pizza boxes:
When we cleaned out my brother's apartment I got back a desk that I painted years ago and set my lightbox on it and it's now a dedicated calligraphy area - maybe I'll actually do more of it now:
Just to the right of that area is more storage of art supplies and books:
And more....mostly paper storage:
I dug out all of my old photos and scrapbooking supplies, organized the pics into categories and set up a separate desk (another great Freecycle find!) and storage areas for all of them, so that I can scrapbook or scan in and collage with them at any time I want to! 
From here, we're trekking on down the stairs to the opposite end of the house.  Did some desk and table shuffling in the sewing room too. Hmmm - it looks like night and day by the light of these pics but they were mostly all taken in the day.  Unfortunately it highlights the lack of direct sunlight in the art rooms. 

Yes, it's quite a bit fuller than the last pic you may have seen of it!
The little sewing table that I have simply doesn't work well with my particular sewing machine, an Elna 2600, because of the shape of it. It just doesn't fit well and it makes free-motion stitching very difficult.  It's this one in the foreground to the right and I think it'll work better with this old Singer but I haven't quite found the trick to positioning it to the right level.  I wonder if I'm missing a part?  I can move it up and down easily enough, but can't fix it to the place I want it.  Anyone know?

So, I went back to the foam insulation "table top" that I rigged a couple of years ago.  I cut out the exact shape of my sewing machine into the foam and sandwiched together 2 layers of foam to make the exact 3 inches thick that I needed to fit my machine very tightly into it. Covered that with some sale priced vinyl from Joann's and, viola! - it looks like a new table!  And I can't wait to do some free-motion stitching on it!
Here's a few more views of the sewing room...lots of fabric storage:
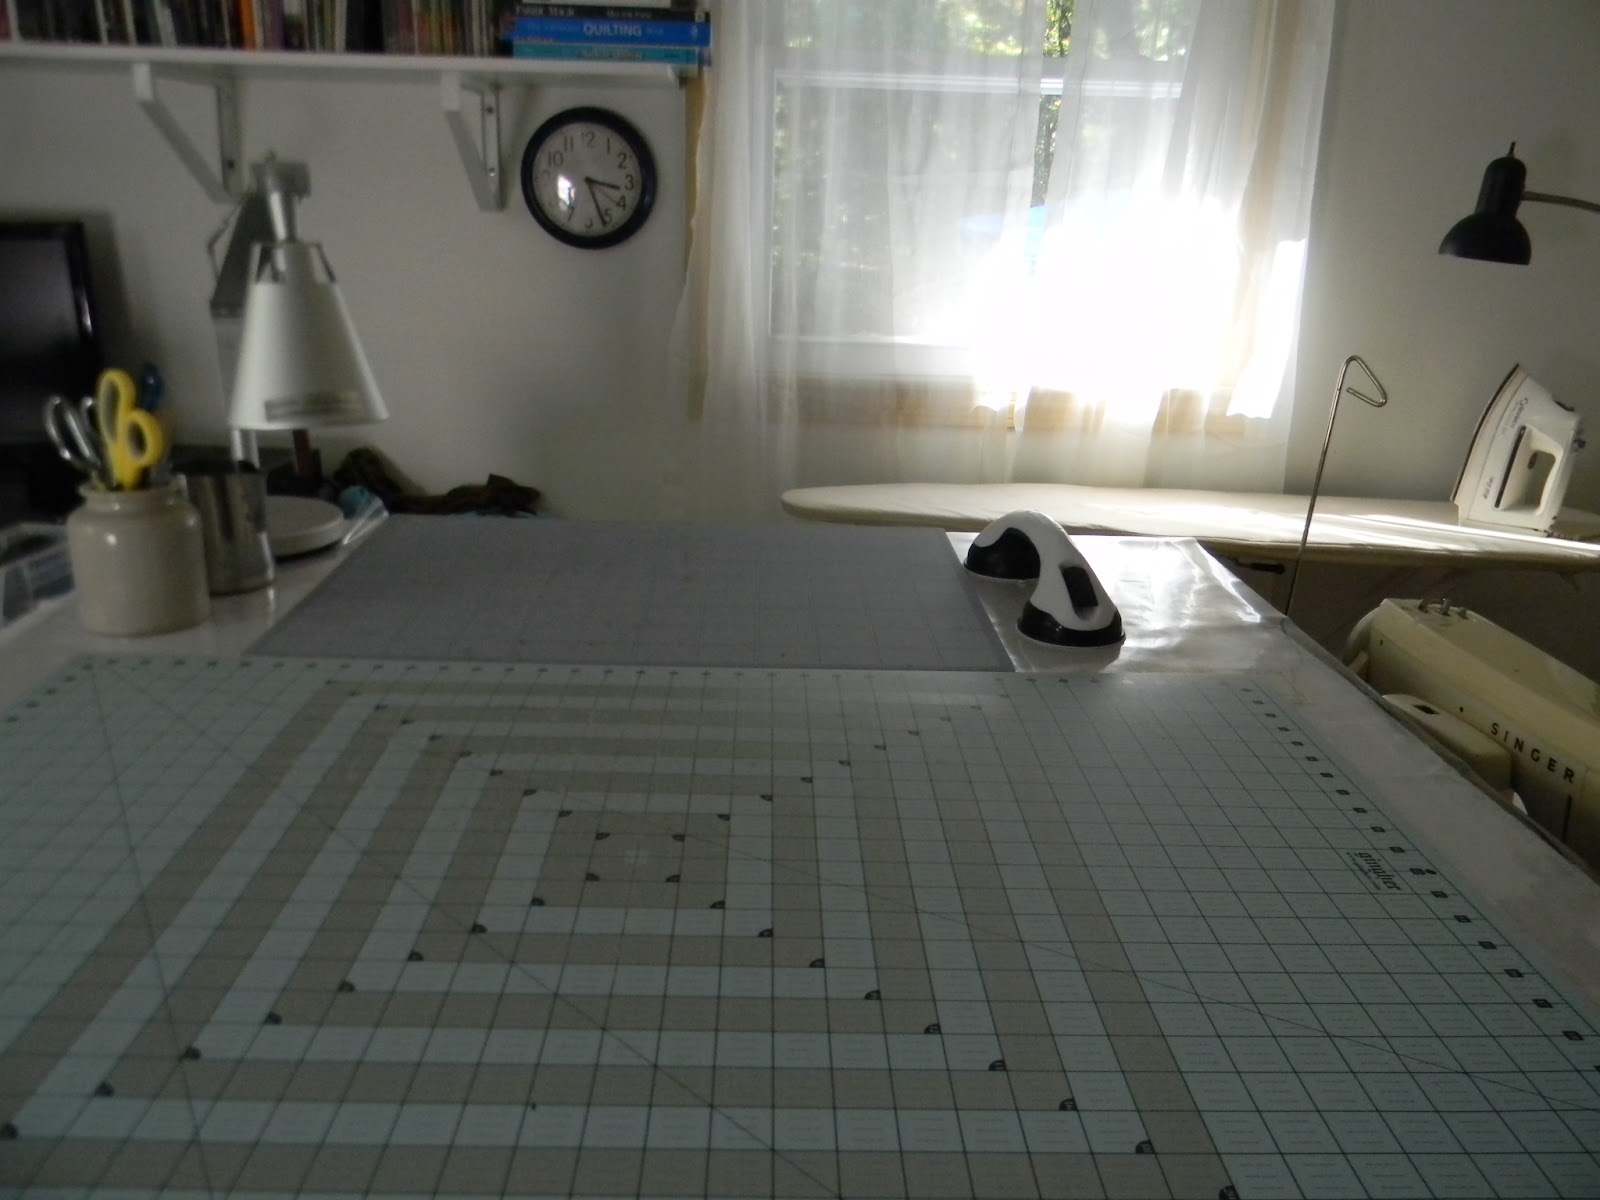
 ...probably the view I see most of at the cutting board:
 And last, but not least, my design wall - ready for the next project:
*Stay tuned - you never know what you're going to see next time!


Tuesday, September 11, 2012

Here's a peek at what happened in my studio in the past few days:

My response to Quilting Arts "Staycation" Challenge - a 4 x 6" postcard.  It's going in the mail in the morning!

When I was at the New England Quilt Museum a few weeks ago, Sylvia pointed out an interesting publication among the "yard sale" items.  It was fascinating so I picked it up for $5, Fabric Post Cards by Judi Warren put out by American Quilter's Society.

With this subject in mind, I then read about the QA Postcard Challenge and away I went!  Really a challenge to do something like this so small!  But it was fun!

Sunday, September 9, 2012

Maybe I'm a M 'Kmaq...

This print is in a page of another book. The theme was "Native American and Canadian Cultures." As a kid, I remember my grandmother, who was originally from Nova Scotia, telling me that we were of Native Canadian heritage.  I 'm pretty sure she said her grandmother lived on a reservation and she married a Scot.  We have no documentation of this.  The records seem to end with my grandmother's mother.  Nevertheless, I grew up believing and identifying with Native Americans and Canadians, along with the French Canadian ancestors that we do know about.


So, I chose to explore the Mi'Kmac culture for this project because it's most likely that we emanate from this tribe, whose tribal lands stretched from Nova Scotia and PEI to New Brunswick and southward into northern Maine.  It' a carving of an authentic Mi' Kmaq women's shirt.

Tuesday, September 4, 2012

Bridging The Mixed Media

For the past year I've been hosting an artist book exchange.  Actually, it's a round robin and there have been 2 of them. One is finished - a paper arts exchange, called Book Arts Round Robin (BARR); the  current one is a fiber art book, called Book Arts Round Robin 2 (BARR 2).

This is the one I thought I'd begin to share a little with you because it bridges the mediums of carving and printmaking with fiber art.


This is the cover page for my own book.  Each person will make 2 pages for my book, the theme is "Pattern and Design." It is being sent off to 9 other artists and when each of them is finished adding to it, it will return to me and I will then bind all of the pages into a book.  Of course, all 9 of us are doing this and so we will each end up with one book, our own, with 18 pages of fiber art executed according to the parameters that we set out for our own theme and size, to bind together for their own unique artist book!


 In this first page, you can see that the edges of the pages are loose so that I can bind them into a book when they are all gathered together at the end of the round robin.

First, I took some muslin and painted on the blue, brown and black loose stripes with fabric paints, heat set that and cut it into the sizes and shapes I needed.  I don't plan these steps in advance.  I do it as I go along.  Of course, I sometimes screw it up royally and rip out scads of stuff, but that's what happens in my little domain!

Then I took another piece of painted muslin and transferred a clip art tree design onto it using Leslie Riley's TAP (Transfer Artist Paper).  I made a pocket out of that and sewed it on to the bottom half of the page.

For the tree branches I sewed up some fabric scraps as you would do to make a binding and I wrapped that around and around and quickly stitched it as I held onto one end by my teeth. I shoved the other end and dropped it  under the presser foot of my machine  freeing up my other hand to hand to guide it through the stitching process.  Then I just sewed it by hand onto the upper half of the page and attached a print of my crow carving on muslin and covered that with a bit of organza, so it's a little shimmery and exciting ( of course some of these things just don't read as well on the computer as they do close up and in person. For the finishing touch I added hand embroidery and beads.


To continue on with the subject of trees, I dived into my first effort at gelatin printing on fabric.  I made leaf shapes out of tag board and rolled some fabric ink over them - I had a blast doing this!  I love gel printing! Again, I added more twisted up fabric for seam binding, hand embroidery and beads


Then I made a card stock tag to go into the pocket with an artist statement. It was so much fun to get started and mail it off to wait for the first arrival of someone else's pages!

Saturday, September 1, 2012

This is the last batch of pics I'll be posting from the LQF and are from either The Whistler Museum of the Brush Gallery and are among my own faves of the show.

I didn't get the title of this but it is a
Wen Redman, whose work I love
...anyone know the title?
Don't know who did this or the or below
but I think they're wonderful!

Carrie Hedstrom did this,
"The Woman With The Tattooed Hands."
This is Peggy Brown's "Duet III."

Susan McCraw, "Fascinatin' Rythm."
Mary Durda of Needham, MA did this bold geometric
called "Woman In A Man's World."
Nancy Crasco's "Lost In A Fog" is a fine example of a transfer printed quilt.
It's brilliant in execution, especially in its' minimalist construction.
This "Nocturne Dupont Plant" and the one below, "Nocturne Bewers Mills Lock"
are by the talented Pamela Allen of Ontario, Canada.

This was the smallest quilt but it left a large impression on me:
"Backyard Owl" by Cheri Wilkins of  Kittery Point, ME.
Again, I don't know who did these, top and bottom, but I remember that they're by different artists and thought they were both striking!

There were many more, of course, than you have seen here.  Some I simply got terrible pics so I can only blame myself, but some of the most well known quilter's don't allow you to photograph their work and there were some extraordinary pieces among these!  What can I say - take it in yourself next year!

Now, I'm going out to enjoy some of this very fine weather!